 Animweb Technologies
Administrator guide
Run the institution from its dashboard - structure, people, attendance policy, departments and offices, reports, leave and the audit log.
13 min read
Institution admins see the whole institution. Heads of department, department directors, cluster heads and deans see the parts they are responsible for. A Department Director has the same view as a head of department, for the department they are given.
Your dashboard
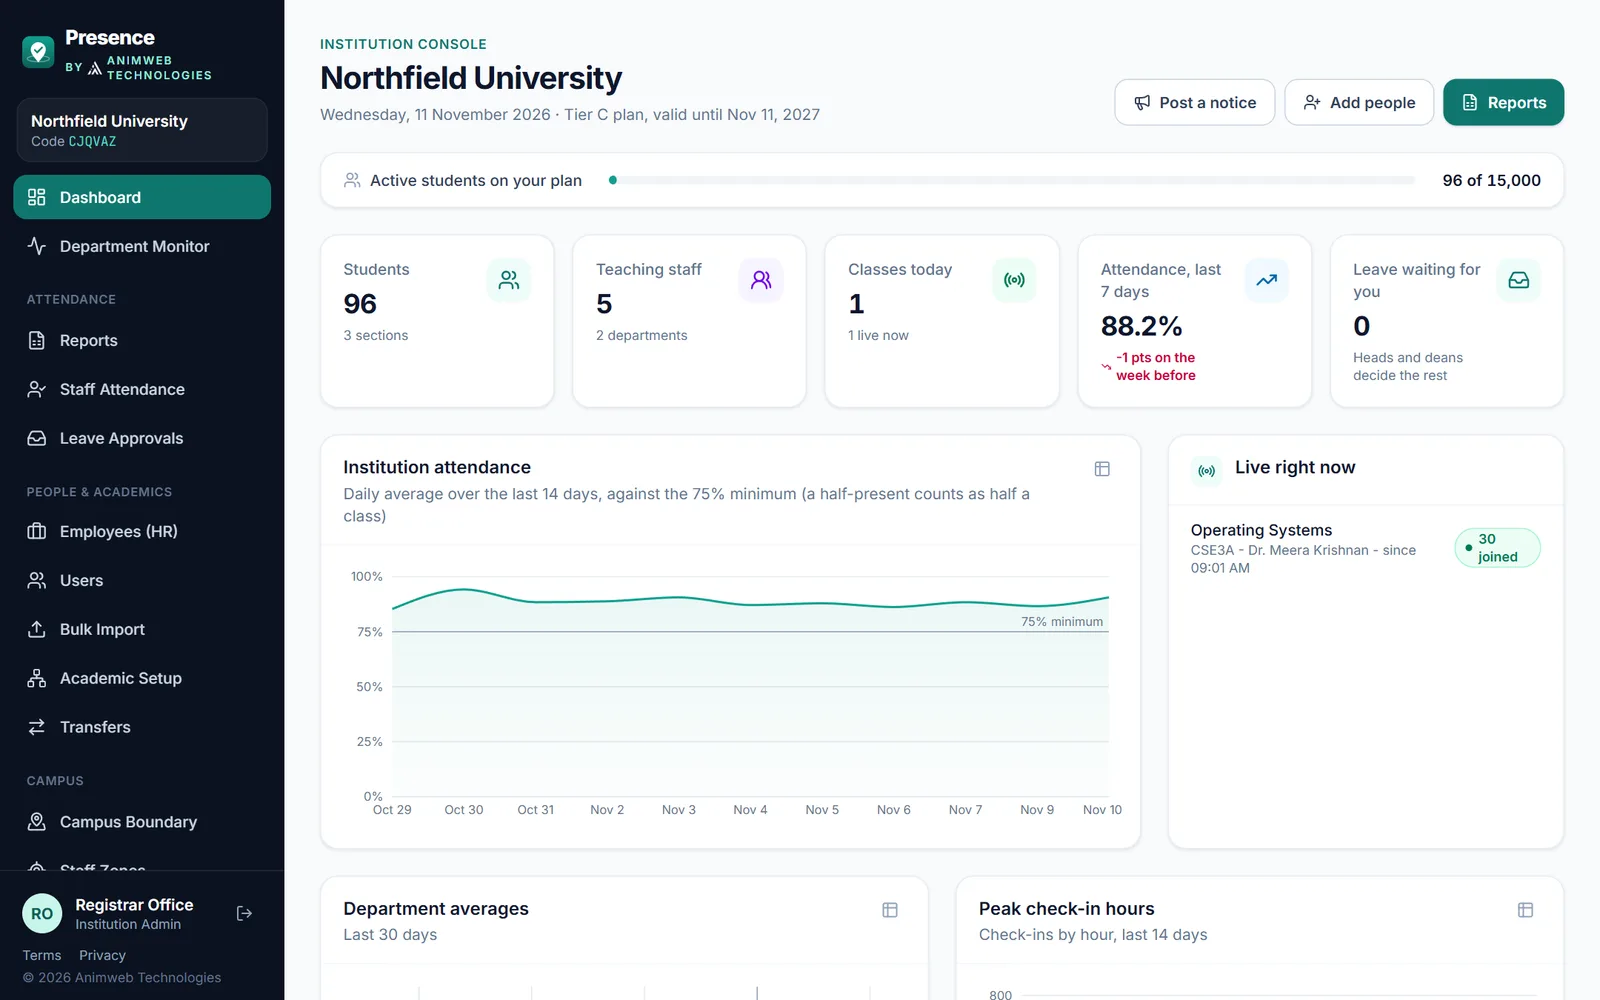
The institution dashboard. Click any screenshot to enlarge it.
The Dashboard is the opening page of the institution console. It shows totals and trends for the whole institution, never anyone’s personal records, and the console has no attendance of its own.
- Header: your institution, today’s date and your plan, with Post a notice, Add people and Reports buttons. One line shows active students against your plan’s limit, with an Upgrade link when you are close to it.
- Key figures - click any card to open the page behind it:
- Students, with the number of sections;
- Teaching staff, with the number of departments;
- Classes today (counted from midnight in your institution’s time zone), with how many are live now;
- Attendance, last 7 days, with the change in points from the week before - red if it is below your minimum;
- Leave waiting for you - only student leave that no head of department or dean can decide. Everything else stays with them.
- Charts: attendance over the last 14 days against your minimum, classes live right now, department averages over 30 days and the busiest check-in hours. The table icon on each chart shows its figures.
- Needs your attention: how many departments, desks and offices are running well, need watching or need attention, with the main reason for each. Department monitor opens the full picture.
- Run the institution: shortcuts to People, Academic setup, Offices, Fees & dues, Library and Settings, followed by the latest notices.
Setup checklist
Until your workspace is ready, the Dashboard shows a setup checklist in the order the steps depend on each other: campus boundary, departments and sections, staff, subjects with their teachers and sections, students, mentors and a first class. Each step links to the page where you do it, and a progress bar shows how far you are. Finished steps are hidden - click Show completed steps to see them again. The checklist disappears when every step is done.
A Things to fix card stays visible while anything needs attention (a problem that is still an open checklist step is listed only once, in the checklist), for example:
- subjects with no teacher, or not linked to any section;
- sections with no mentor;
- students not placed in a section (they cannot see any class) - the link opens Users filtered to them;
- ended classes not finalised for more than a day;
- students without Face ID, when your institution requires it.
Department monitor
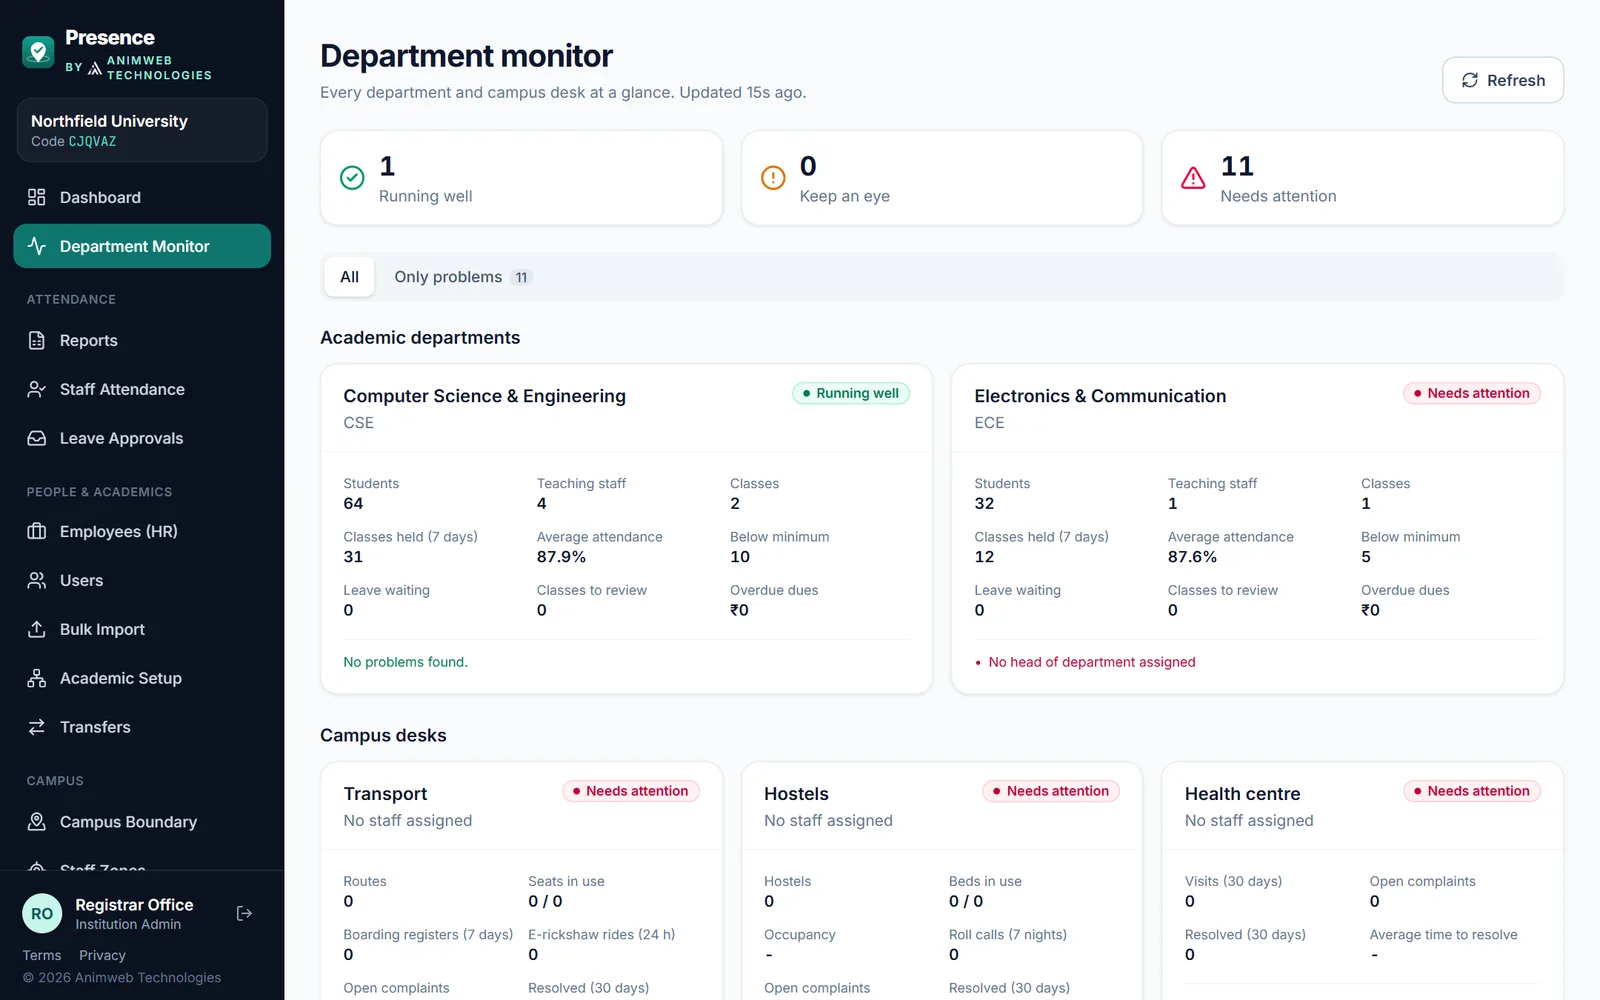
The Department Monitor shows totals and status only, never personal records.
Department Monitor shows whether every part of the institution is working well, on one screen. Each academic department and each campus desk gets a status: Running well, Keep an eye or Needs attention, with the reasons.
- Academic departments: students and teaching staff, classes held on Presence in the last 7 days, average attendance over 30 days, students below the minimum (a count), student leave waiting for a decision, classes not yet reviewed by teachers, and overdue dues. A department without a head, or with no classes taken in a week, needs attention.
- Campus desks: transport, hostels, health centre, security control room, estate, HR, library and accounts, each with its own measures (for example boarding registers kept, night roll calls taken, complaints open for more than 3 days, average SOS response time, overdue books, money collected this month). A desk with nobody assigned needs attention, with an Add staff link.
- Only problems hides everything that is running well.
The monitor shows counts and timeliness only. It never lists who lives in which room, rides which bus, reads which book or visited the health centre.
Campus boundary
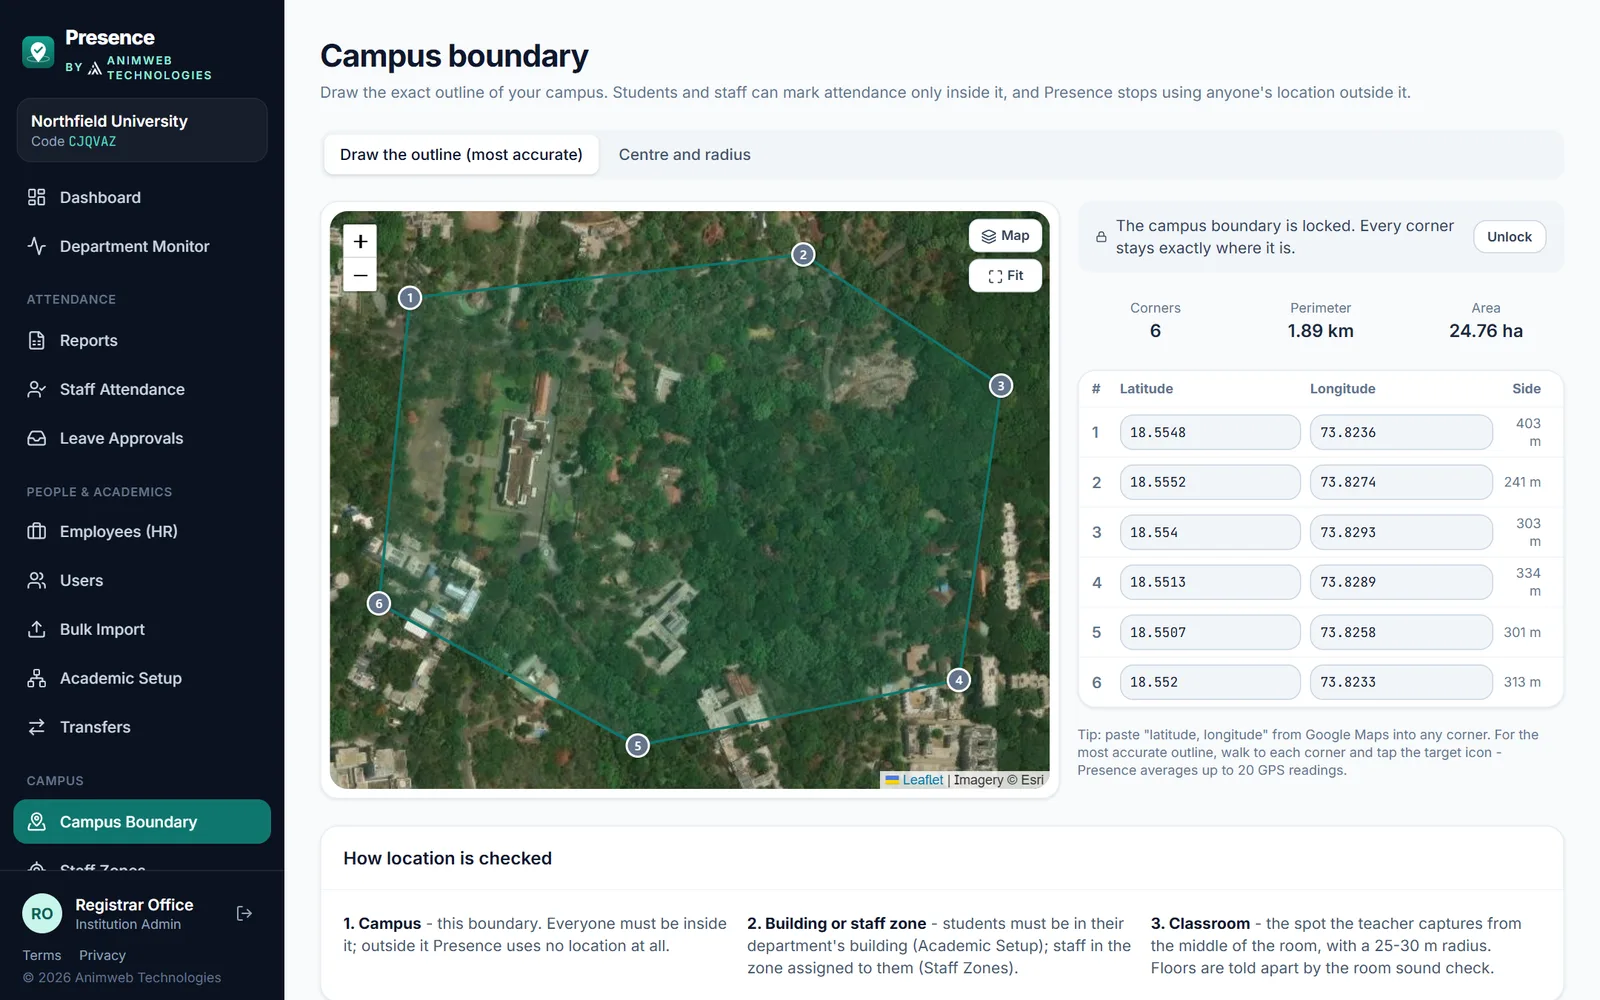
The campus outline, drawn on a satellite map and locked.
Open Campus Boundary, draw the exact outline of your campus on the satellite map (click each corner, drag or type exact coordinates), then Save and lock. Students and staff must be inside it to mark attendance, and Presence uses no one’s location outside it. Then give each department its building and draw the areas where staff mark attendance. See Campus boundary, buildings and staff areas.
Academic structure
Open Academic Setup. The tabs are in the order you need them:
- Departments have a code (
CSE), optionally a head of department, and their own programme length (1 to 6 years) and terms per year (annual, two semesters or three trimesters). A 3-year department cannot have a year-4 class, and its classes graduate after their last term. - Sections belong to a department, year and term (
CSE-3A). Assign a mentor to each section - mentors approve leave first and can reset a student’s registered phone. Give the person the Mentor role in Users first; a user with only the Teacher role cannot see leave requests. - Subjects map teachers to sections. A teacher can only start classes for subjects they are ticked on. Leave the sections empty to allow every section.
- Buildings are optional circles, used only when Settings → Students must be near the teacher’s phone is turned off.
- Clusters (optional) group departments (for example a College of Engineering) under their own head, such as a principal.
Attendance requirements. A department, or a single subject (for example a lab), can have its own minimum attendance. The most specific one applies: the subject’s, then the department’s, then the institution’s minimum from Settings. Reports, the at-risk lists, every student’s app and the department monitor all use it. Leave the box empty to go back to the institution’s minimum.
Changing and removing. Every item can be edited at any time.
- Archive hides an item from pickers but keeps its history, and Restore brings it back.
- Delete permanently (administration only) removes an item for good, but only when nothing uses it any more. If people, classes, recorded lectures or marks still refer to it, Presence says exactly what, so nothing is ever lost by mistake.
- Promote moves a class to its next term (and year) with all its students, following its department’s own programme length.
- Graduate closes a class after its last term.
Every university is organised differently, and Presence fits each one:
- A college with a principal: make it a cluster and give its head the Cluster Head role.
- A dean for each year: a Dean with that year set (and a department, if the dean serves only one).
- A dean for the whole programme: a Dean with only the department set.
- A dean over everything: a Dean with nothing set.
Names and titles
In Settings → Names and titles, use your own words: call clusters Colleges or Schools, sections Classes or Batches, and rename any role, for example Cluster Head as Principal. Only the names change; what each role can do stays the same.
Onboarding people
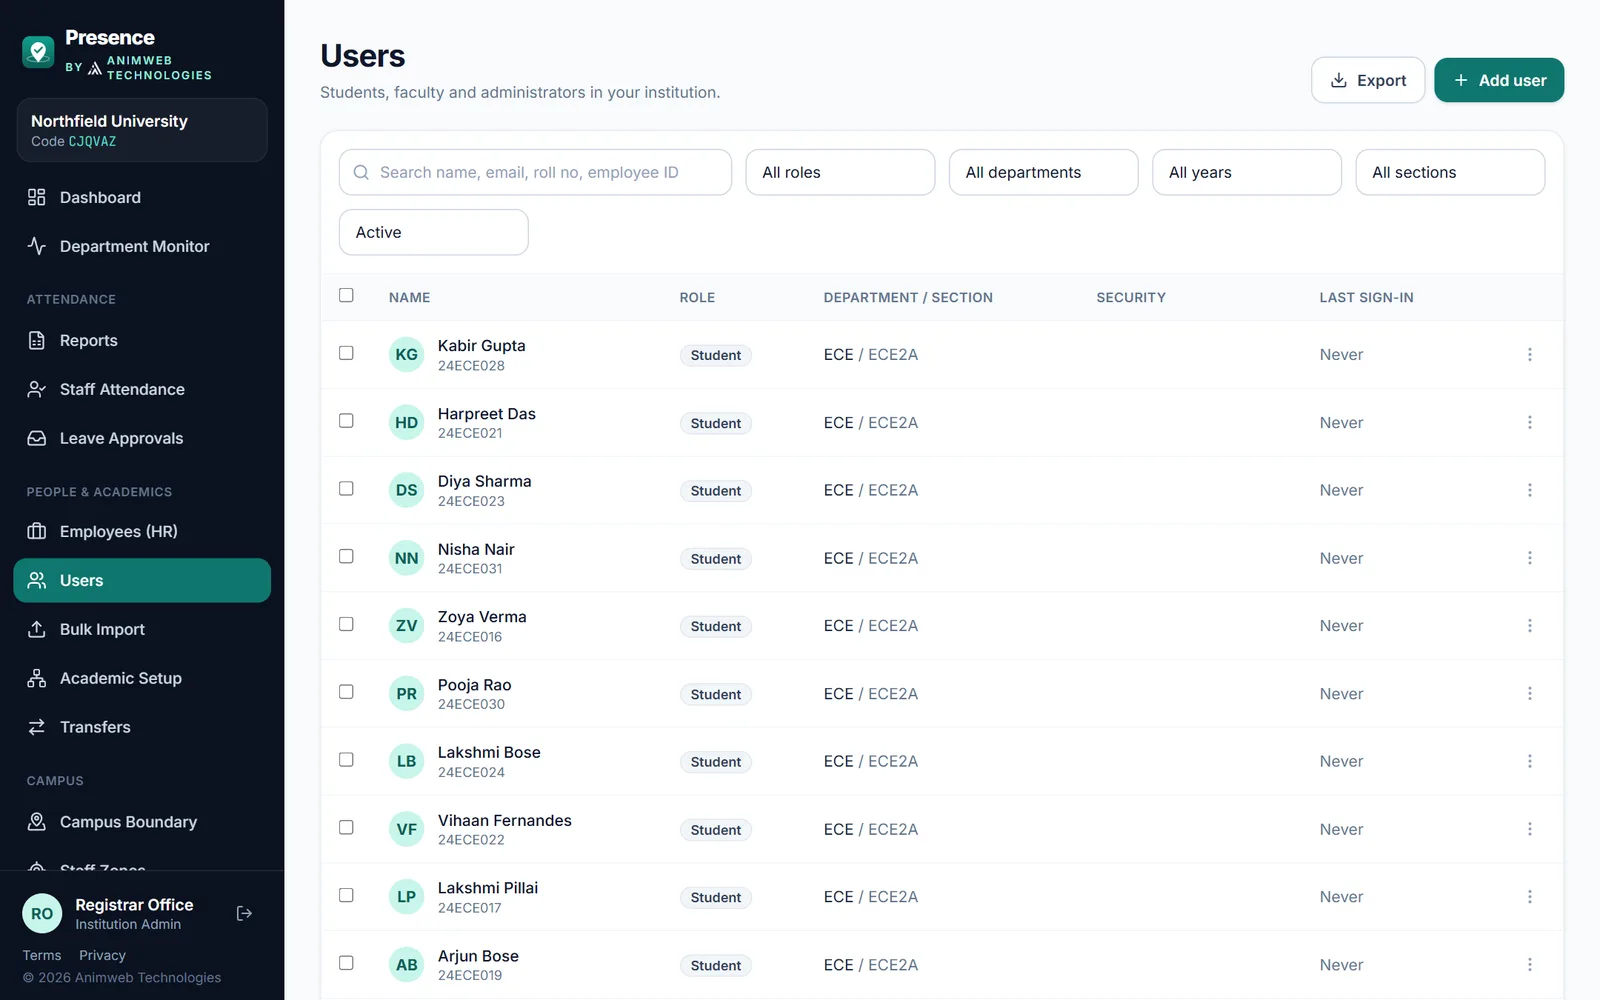
Users: everyone in the institution, with search and filters.
Bulk Import accepts an Excel workbook (.xlsx, first sheet) or a CSV file with these columns:
name,email,rollNo,employeeId,phone,role,department,section,year,semester,password
roleis one ofstudent,teacher,mentor,hod,dept_head,cluster_head,dean,club_organizer,exam_officer,placement_officer,hr_officer,accounts_officer,librarian,office_staff,transport_manager,hostel_warden,health_officer,security_officer,estate_officeroruniversity_admin. See Roles and permissions for what each can do.departmentandsectionuse the codes from Academic Setup.- Students need a
rollNoand asection- a student without a section never sees a class. - Leave
passwordempty to generate one; a credentials CSV is offered for download once. Share it privately: everyone also needs the institution code. - Everyone must choose their own password at first sign-in. They do not retype the temporary password, and Presence can suggest an easy-to-remember strong one.
- To let people sign in with their university Google account as well, turn on Settings → Sign in with Google and enter your email domain. Each person’s email in Presence must be the one they use with Google. See Signing in & signing out.
To correct a list later - new admissions, section changes, students who left, the move to the next semester - see Class lists, years and departments.
Find students who have not set up yet: on Users, use Export and check the Device Bound (phone registered), Face Registered and Last Login columns.
Who sees what
The full reference is Roles and permissions. In short:
- Student leave is decided by the class mentor and then the head of department or dean. The administration sees and decides a student’s leave only when that department has no head and no dean covering the year.
- Institution administrators see every department, class, student and staff member, and set up the whole institution. They do not see who rides which bus, who stays in which room, health records or at-risk lists: those stay with the transport desk, the wardens, the health centre and each department. Campus Services shows the administration the totals (seats and beds in use, open complaints, visits).
- The Institution Admin login is the institution’s shared console for setting everything up. It is not a person, so it has no attendance, leave or face of its own and never appears in staff lists. Each person who works in the administration gets a personal account with their own attendance and leave: the Registrar and their assistants in an office (see Offices), the Controller of Examinations as an Examinations Officer (see Examinations department) and placement staff as Placement Officers. The audit log shows who did what.
- Heads of department see only their own department (see Heads, deans and mentors). Deans see the year and/or department they are set up for (no limit set = the whole institution).
- Class mentors see their own class: every student, every subject and its teachers (My Class).
- Subject teachers see only the classes they teach.
- Nobody sees another department’s students unless you give them that responsibility (for example by making them a dean of that department).
Departments and offices
Each department of the institution has its own desk and its own guide. Give each person the matching role in Users:
| Department | Role | Guide |
|---|---|---|
| Examinations | Examinations Officer | Examinations department |
| Training and placement | Placement Officer | Placement cell |
| HR | HR Officer | HR and staff attendance |
| Accounts | Accounts Officer | Fees and dues |
| Library | Librarian | Library |
| Transport, hostels, health centre | Transport Manager, Hostel Warden, Health Officer | Transport, hostel and health centre |
| Security, estate | Security Control Room, Estate & Infrastructure Officer | Help & Safety |
| Registrar’s Office and any other | Office Staff | Offices you create |
The administration posts institution-wide notices - see Notices and circulars - and sees every student’s fees and dues. Marks, placement applications and personal service records stay with their own departments; see Roles and permissions.
Transfers (mid-semester changes)
Open Transfers (administrators and deans). Pick the current teacher: their subjects and mentored classes are listed. Tick what moves, pick the new teacher and confirm.
- Attendance already taken and marks already entered do not change. Classes the old teacher took stay in their history.
- Open assignments and mark sheets of the moved subjects pass to the new teacher.
- Leave requests waiting for the old mentor go to the new mentor.
- A teacher who receives a class mentorship is given the Mentor role automatically.
- A subject cannot move while its class is live - end the class first. Every transfer is in the Audit Log.
Attendance policy
Under Settings:
| Setting | Default | Meaning |
|---|---|---|
| Present threshold | 91% | Share of the class time a student must be verified in the room to be Present |
| Minimum attendance | 75% | Students below this are flagged at risk |
| Join-code rotation | 30 s | How often the code on the board changes, for new classes (10-120 s) |
| Students must be near the teacher’s phone | On | Teachers capture the classroom position from their phone when starting a class, and students mark attendance only within the radius around it. Each phone checks this itself, so the servers do very little work. Turn off only to allow a building or the whole campus instead |
| Classroom radius | 30 m | How far from the teacher’s captured spot students may sit (teachers choose 20-60 m) |
| Face match threshold | 0.55 | How closely a face must match. Lower is stricter |
| Require face | Off | Students must match their Face ID to join |
| Compulsory install | On | Students must install the app before using it; attendance from a phone browser is refused |
| Campus network check | Off | Attendance only from the campus Wi-Fi. While on campus Wi-Fi, tap Add the network I am on now to fill in the range (see location accuracy) |
| Medical leave needs a document | On | Students must attach a certificate or prescription |
Teachers can change the join-code rotation, classroom radius, face requirement and room check for each class; the present threshold applies to everyone.
Reports
- Dashboard: key figures with the change from last week, daily trend against the minimum, department averages, live classes and peak check-in hours (see Your dashboard).
- Reports: institution CSV for a day, week or month (the Finalised column shows which classes were reviewed); per-section matrices; and the Subject register - pick a section, a subject and dates to get students down the side, class dates across the top and P (Present), H (Half), L (Left early), A (Absent) or E (Excused - leave) in each cell, with totals and %. Print it or download the CSV.
- At-risk students: current students below the minimum, with the number of classes they need in a row. Switch between Overall and Per subject, and download the list as a CSV.
- Student attendance card: click a student’s name in a section report or the at-risk list to see their subjects, recent classes (with any changes and their reasons) and leave history. Print it for a parents’ meeting.
All exports are spreadsheets that open straight in Excel, with summary rows.
Leave and corrections
Students apply for leave in the app, with scanned documents for medical leave. The class mentor approves first, then the dean of the student’s year, the HOD, a cluster head or an administrator decides under Leave Approvals. Approved leave automatically marks matching absences as excused. See Medical leave and documents.
After a teacher finalises a class, only an HOD or administrator can change a record. The Audit Log records each finalisation, every per-student change (old and new status, with the reason) and every leave approval.
Phones and Face ID
If a student reinstalls the app or changes phones, their mentor taps the phone icon (Reset device) next to the student on My Section, or an administrator uses Users → Actions → Reset phone (or Reset phones for several students at once). The next phone the student marks attendance from becomes their registered phone. Reset Face ID (HODs and administrators) lets a student register their face again.
Billing
Billing shows your plan, GST invoices and receipts. To renew or upgrade, request an invoice there and pay it by bank transfer (NEFT, RTGS or IMPS). Your plan is updated within one business day of the funds reaching us. Nothing is ever charged automatically. See Plans and pricing.