 Animweb Technologies
Getting started
Book your free demo workspace, then run your first verified class in about fifteen minutes.
3 min read
Presence replaces the attendance register with a check that students cannot fake: they must be in the classroom, on their own phone, typing the code currently on the board, and they must stay for the lecture. This guide gets you from zero to your first verified class.
1. Book your demo workspace
- Open the demo page, choose Continue with Google and book a demo with your institution and your own details. You become the workspace administrator.
- We set up the workspace and, within one business day, email you an institution code (for example
D7K2QX), your administrator email and a temporary password. We can also walk you through it on a call.
Everyone in your institution signs in with the same institution code plus their own email, roll number or employee ID.
2. Sign in and secure your account
Open the app link, enter the institution code, your email and the temporary password. Presence then asks you to choose your own password - you do not type the temporary one again. Tap Suggest an easy-to-remember strong password if you like. Turn on two-factor authentication from Profile straight after.
Running Presence on your own servers? A new installation opens Set up your institution instead, where you create the institution and your administrator account. See Running Presence on your own domain.
3. Set your campus boundary
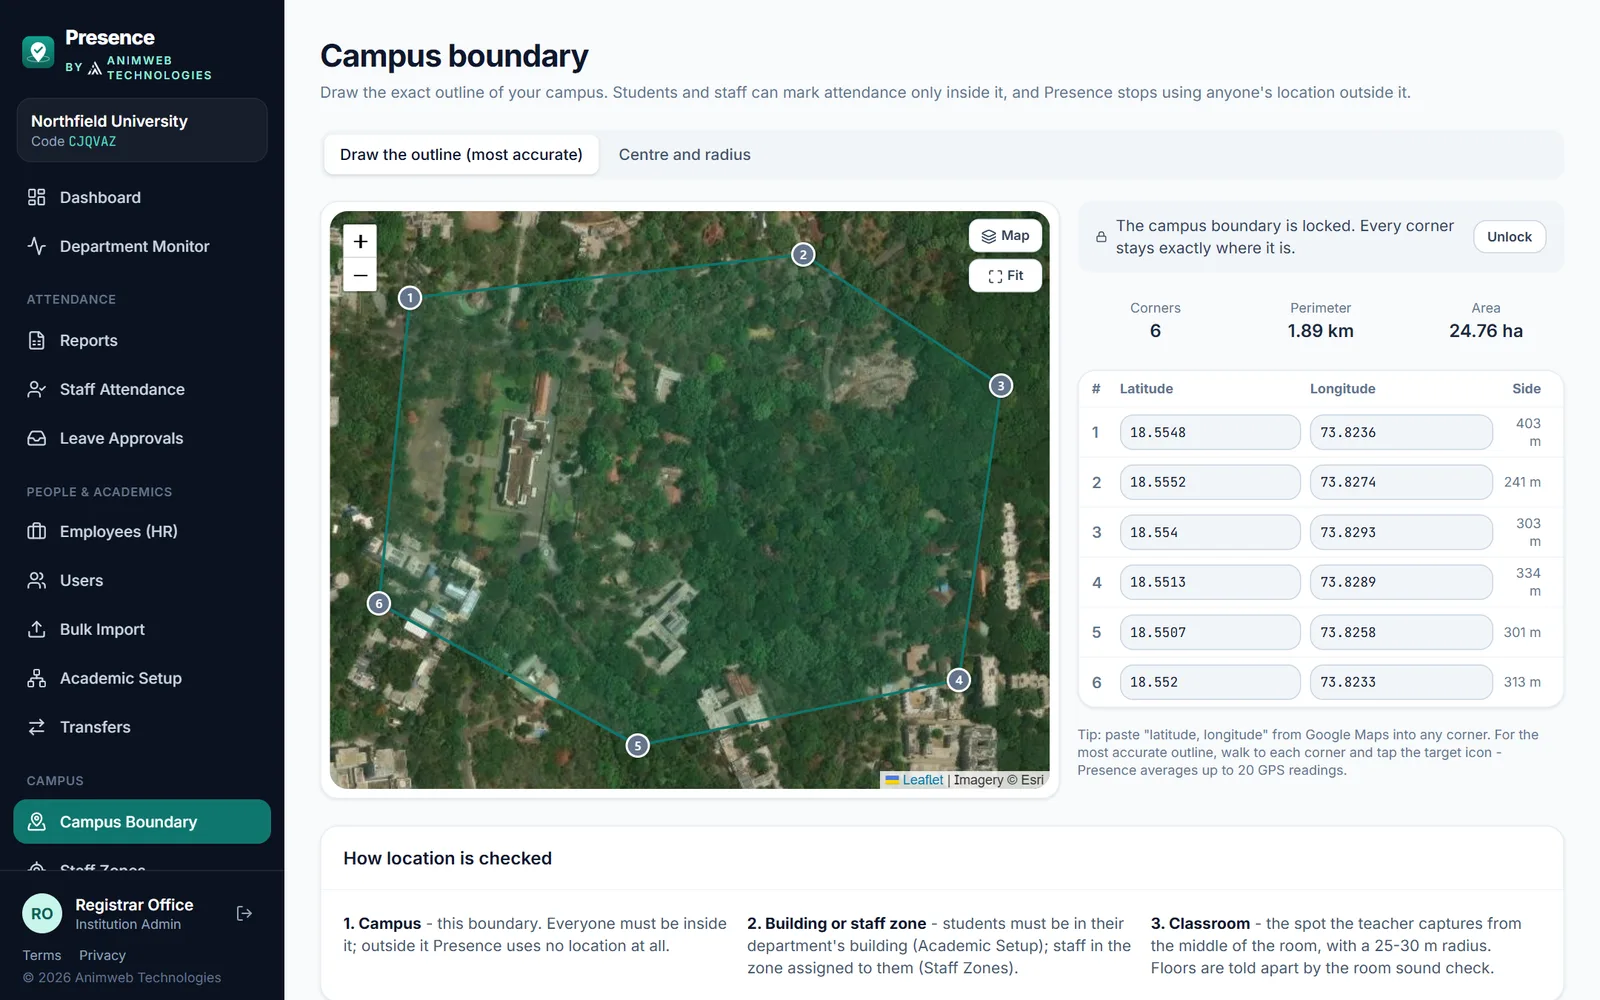
Draw your campus once; it locks when you save.
Go to Campus Boundary and draw the outline of your campus on the satellite map, then Save and lock. Students must always be inside it, as well as inside their department’s building and the classroom the teacher captures. See Campus boundary, buildings and staff areas.
Your Dashboard shows a setup checklist in the right order with a progress bar, and a Things to fix card for anything still missing, such as subjects without a teacher or students without a section. Once you are set up, it shows the institution’s key figures, attendance trends and anything that needs your attention.
4. Add your people
Your workspace starts clean - only your own data, no sample records. Open Academic Setup to add departments and sections, add teachers and staff in Users, add subjects and tick their teachers and sections, then use Bulk Import to upload students from an Excel (.xlsx) or CSV file. Temporary passwords are generated for each person; share them with the institution code.
The trial is meant for one class of 30 to 40 students with their teachers, and allows up to 50 accounts in all.
Going live for the whole university? After the contract, Animweb Technologies customises Presence completely to your university’s needs and sets it up in about one month (one-time ₹50,000 before GST). See Complete customisation and setup.
5. Run a class
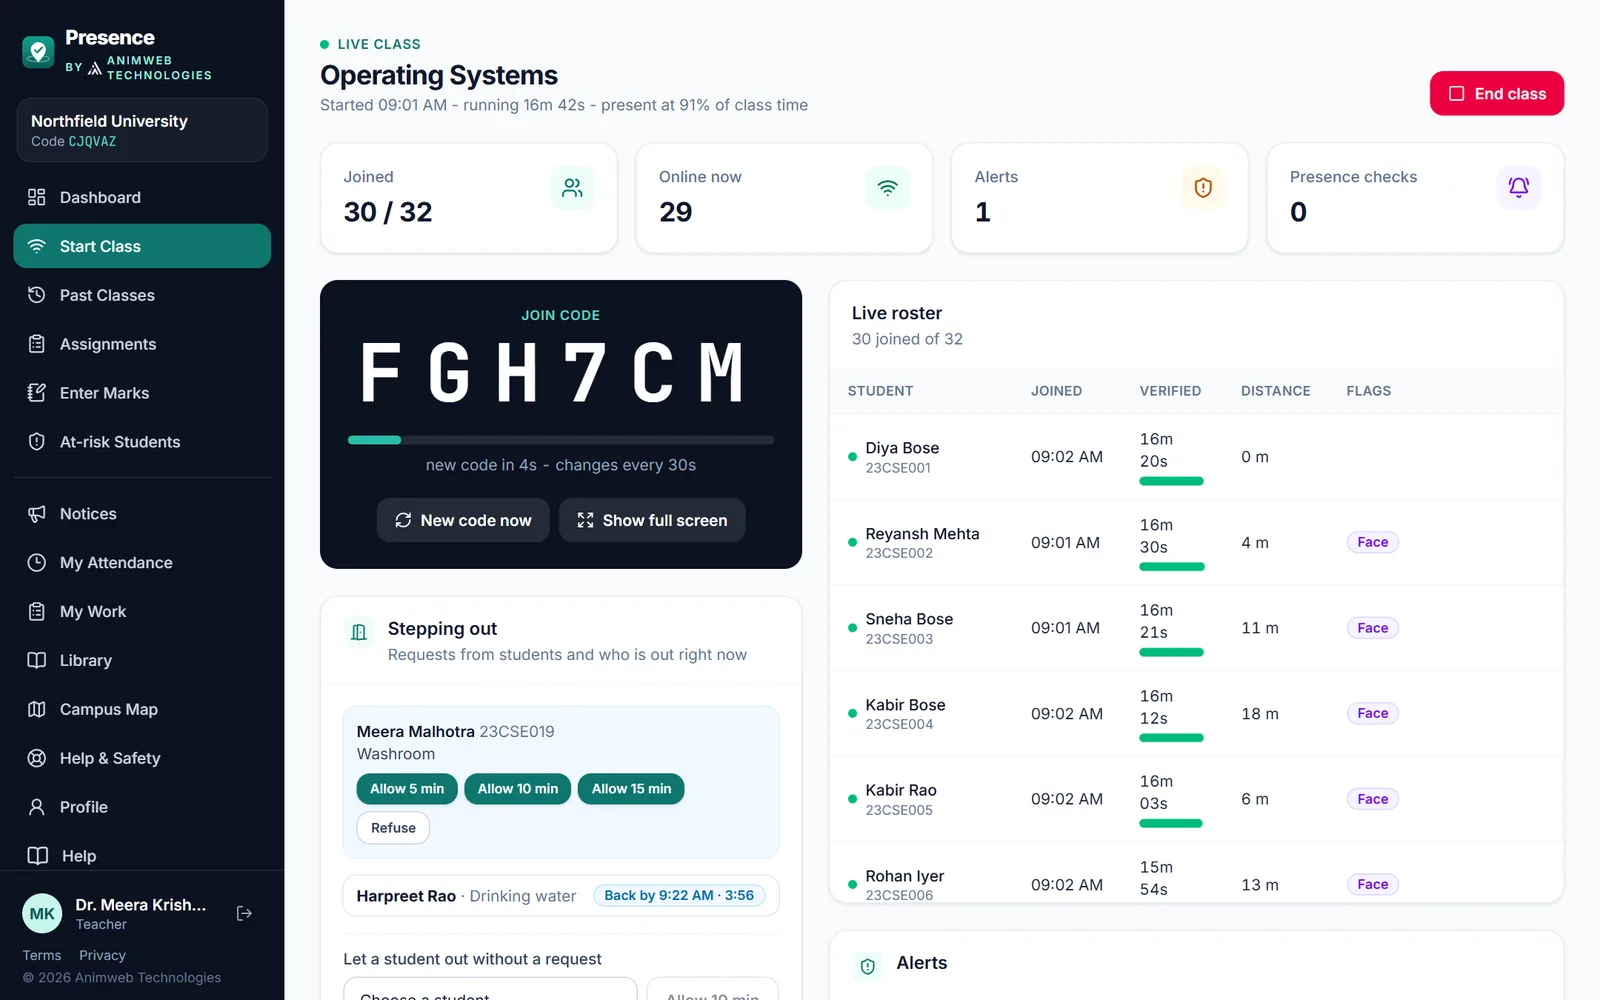
A class in progress, as the teacher sees it.
- Sign in as a teacher, open Start Class, choose the section and subject and tap Capture classroom location while standing in the room.
- Students open the installed Presence app, go to Mark Attendance and type the code shown on the board.
- Watch the live roster fill up. Try a presence check halfway through.
- Tap End class, review the suggested statuses and Save & finalise.
What next
- Run the institution: the administrator guide and class lists.
- Bring in your departments: Examinations, the placement cell, HR, fees, the library and your own offices.
- Share the teacher guide, the student guide and the guide for heads, deans and mentors with your people.
- Keep Troubleshooting and Roles and permissions handy.